LEGO Education SPIKE Prime Set: My Honest Experience Using It for STEM Learning

LEGO Education SPIKE Prime Set 45678

Best overall

LEGO Education SPIKE Prime Set 45678

I still remember the first time I opened the SPIKE Prime set… it didn’t feel like a toy. It felt like a full-on learning system. And honestly, I underestimated it at first.

This set isn’t just LEGO bricks—it’s a full STEM (Science, Technology, Engineering, Math) learning kit designed for students around ages 11–14. But I’ve seen older learners (even adults) struggle a bit at the beginning. Yeah, it’s that deep.

What Exactly Is LEGO Education SPIKE Prime?

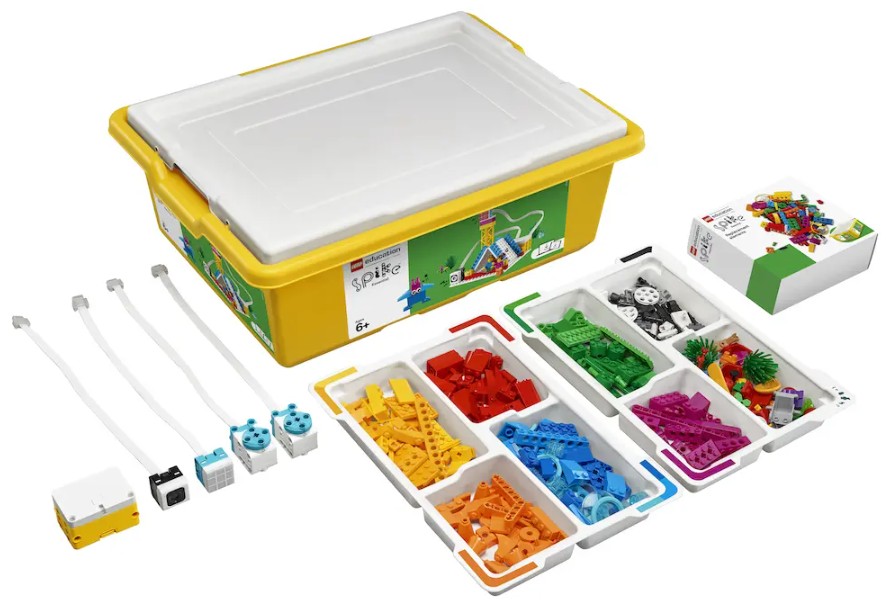
The LEGO Education SPIKE Prime Set 45678 is a hands-on robotics and coding kit created by LEGO Education.

It combines:

  • LEGO Technic parts
  • Motors and sensors
  • A programmable hub
  • Coding via Scratch and Python

The goal is simple: make learning feel like play—but structured play.

Each set includes around 528 pieces, plus guided lessons and a coding app to bring your builds to life .

My First Build (And Where I Almost Gave Up)

I’ll be honest here—I thought I could just freestyle it. Big mistake.

I skipped the official lessons and tried building a robot straight away. It moved… kind of. Then stopped. Then I realized I had no idea how the sensors worked.

That’s when it hit me: this set is designed to be followed step-by-step at first.

Once I switched to the official app lessons, everything started making sense. Slowly, but still.

Key Features That Actually Matter in Real Use

1. Coding Made Beginner-Friendly (But Not Too Easy)

The SPIKE Prime uses a Scratch-based drag-and-drop coding system.

At first, it feels like a game. You drag blocks, connect them, done.

But then… complexity sneaks in.

You start dealing with:

  • Variables
  • Sensor conditions
  • Loops

And yeah, I messed up loops more times than I want to admit.

The good thing? You can switch to Python later, which makes it more advanced.

2. Real Hardware: Motors, Sensors, and Hub

This is where things get fun.

You’re not just coding—you’re controlling physical objects.

The set includes:

  • Color sensor
  • Distance sensor
  • Force sensor
  • Motors for movement

And when everything works together… it feels kinda amazing.

I built a small robot that followed a line on the floor. Took me hours. But when it finally worked, man, that was satisfying.

3. Structured Lessons (Don’t Skip These Like I Did)

The SPIKE Prime comes with 50+ hours of learning content .

There are full lesson plans like:

  • Engineering design challenges
  • Data analysis tasks
  • Robotics competitions prep

These lessons are aligned with education standards, which means they’re not random—they’re built for real classroom use.

Who Should Buy This Set?

Perfect For:

  • Middle school students (Grade 6–8)
  • STEM educators
  • Robotics beginners
  • Coding learners

Not Ideal For:

  • Very young kids (too complex)
  • Casual LEGO builders
  • People expecting instant results

This isn’t a “build in 30 minutes and done” kind of set. It takes time. Patience. And sometimes frustration.

Expansion Option (If You Want More Power)

LEGO Education SPIKE Prime Expansion Set 45681

An add-on kit with extra motors, wheels, and parts for more advanced robotics builds.

After a while, I realized the base set has limits—especially if you want bigger robots or competition-level builds.

That’s where the expansion set comes in.

It adds:

  • Larger wheels
  • Extra motor
  • More structural parts

If you’re serious about robotics (or competitions), this is almost necessary.

Real Pros and Cons (From Experience, Not Marketing)

What I Loved

  • Hands-on learning feels real, not theoretical
  • Coding + building combo is super engaging
  • Endless project possibilities

What Frustrated Me

  • Learning curve is steeper than expected
  • App is required (no standalone use)
  • Expensive upfront

There were moments I almost gave up. Not gonna lie.

But once things started clicking, it became addictive.

Comparison With Similar LEGO Sets

Feature LEGO Education SPIKE Prime Set 45678 LEGO Education SPIKE Essential Set SPIKE Prime Expansion Set 45681
Target Age 11–14 6–10 11+
Pieces 528
Coding Scratch + Python Scratch (basic) Uses Prime
Difficulty Medium–High Beginner Advanced
Includes Hub Yes Yes No
Best Use Full STEM learning Intro to coding Advanced builds

Tips I Wish I Knew Before Buying

If I could go back, I’d tell myself:

  • Start with the official lessons (seriously, don’t skip them)
  • Don’t rush into complex builds
  • Learn sensors early—they’re key
  • Expect trial and error (a lot of it)

Also, patience is required. This set rewards persistence, not speed.

Is It Worth the Price?

Short answer: yes… but only if you actually use it.

This isn’t a toy you leave on a shelf.

If used properly, it teaches:

  • Coding logic
  • Engineering thinking
  • Problem-solving skills

That’s real value.

But if you expect quick fun without effort, it might feel overpriced.

Conclusion

The LEGO Education SPIKE Prime Set is one of the most powerful educational tools I’ve ever used—once I understood how to use it properly.

It’s not easy at the start. There will be confusion, mistakes, maybe even frustration. I went through all of that.

But if you stick with it, the payoff is huge.

You’re not just building LEGO—you’re building skills that actually matter in the real world.

And honestly, that’s what makes this set worth it.

FAQ: LEGO Education SPIKE Prime Set

  1. What age is SPIKE Prime for?

It’s designed for students aged 11–14 (middle school level).

  1. Do you need coding experience?

No, beginners can start with drag-and-drop coding, then move to Python later.

  1. Can it be used at home?

Yes, but it’s designed for structured learning, not just casual play.

  1. Does it work without the app?

No, the app is required for programming and lessons.

  1. Is it good for robotics competitions?

Yes, especially with the expansion set and practice units.

  1. How long does it take to learn?

Basic skills can be learned in a few hours, but mastering it takes weeks or more.

  1. Is it better than regular LEGO sets?

For learning STEM skills—yes. For casual building—probably not.

  1. Is the expansion set necessary?

Not at first, but it becomes useful for advanced projects.

Computer Vision Projects: What Actually Worked for Me (and What Didn’t)

Computer Vision Projects

Why I Started Building Computer Vision Projects

I got into computer vision thinking it would be simple—just feed images into a model and boom, results. Yeah… that’s not how it went.

My first attempt at a computer vision project was honestly messy. I tried building an object detection system without understanding image preprocessing. The model kept misclassifying things, and I remember staring at my screen thinking, “Why is a cat being detected as a toaster?”

That’s when I realized something important: computer vision projects are less about flashy models and more about understanding the pipeline—data, preprocessing, training, and evaluation.

Once I accepted that, things started to click.

Beginner-Friendly Computer Vision Projects That Actually Teach You Something

1. Image Classification (My First Real Win)

This is where I’d tell anyone to start.

I built a simple image classifier using a small dataset of fruits—apples, bananas, oranges. Nothing fancy.

At first, I didn’t even normalize the images properly. The model accuracy was terrible. Like, embarrassingly bad.

After learning about:

  • Resizing images
  • Normalization
  • Train/test splits

My accuracy jumped from around 40% to over 85%.

That moment felt like a breakthrough. It showed me that data preparation matters more than model complexity.

2. Face Detection Using OpenCV

This project felt more “real-world.”

I used OpenCV’s Haar cascades to detect faces through a webcam. It worked… but not perfectly.

Sometimes it detected random objects as faces. Curtains, shadows—you name it.

Still, it taught me:

  • How real-time detection works
  • The limitations of pre-trained models
  • Why lighting conditions matter

And yeah, lighting matters way more than people think.

3. Object Detection with YOLO (Where Things Got Serious)

This one was a bit overwhelming at first.

I tried using YOLO (You Only Look Once) for object detection. The setup alone took me hours.

But once it worked, it felt powerful.

I could detect:

  • People
  • Cars
  • Everyday objects

But here’s the catch—custom training is hard.

Labeling images manually? That’s tedious. I underestimated how long it takes.

Still, this project gave me a real sense of how computer vision is used in industries like security and self-driving systems.

Intermediate Projects That Pushed My Limits

4. Hand Gesture Recognition

This one nearly broke me. Not gonna lie.

I used a combination of MediaPipe and a classifier to recognize hand gestures.

The challenge wasn’t the model—it was consistency.

Different lighting, hand angles, and backgrounds kept messing things up.

But I learned:

  • Feature extraction techniques
  • Importance of consistent datasets
  • Real-time processing constraints

When it finally worked, it felt like magic.

5. Image Segmentation Project

Segmentation is a whole different level.

Instead of just detecting objects, you’re identifying exact pixel regions.

I worked on a simple project to segment roads in images.

At first, the output looked like abstract art. Completely unusable.

After tweaking the model and improving the dataset, it became somewhat accurate.

This project taught me patience. A lot of it.

Advanced Computer Vision Projects Worth Trying

6. Real-Time Emotion Detection

This project combines face detection with emotion classification.

Sounds cool, right? It is—but also tricky.

The hardest part was getting a reliable dataset.

Emotions are subjective, and labeling them isn’t always accurate.

Still, it’s a great project to showcase in a portfolio.

7. OCR (Optical Character Recognition) System

I built a basic OCR system to extract text from images.

It worked well on clean images. But messy backgrounds? Not so much.

That’s when I learned about:

  • Image thresholding
  • Noise reduction
  • Text detection vs recognition

It’s a practical project with real-world applications like document scanning.

8. Self-Driving Car Simulation (Mini Version)

Okay, this one was ambitious.

I tried building a simple lane detection system for a simulated driving environment.

Edge detection, Hough transforms—it got technical fast.

But this project gave me insight into how computer vision powers autonomous vehicles.

And yeah, it’s harder than it looks.

Common Mistakes I Made (So You Don’t Have To)

Ignoring Data Quality

I used random datasets without checking quality.

Bad data = bad results. Simple as that.

Overcomplicating Models Too Early

I jumped into deep learning before mastering basics.

Big mistake.

Start simple. Always.

Not Evaluating Models Properly

I relied only on accuracy.

Later, I realized metrics like precision, recall, and F1-score matter more in many cases.

Tools and Libraries That Helped Me the Most

Here’s what I ended up using regularly:

  • OpenCV (for image processing)
  • TensorFlow / PyTorch (for deep learning)
  • MediaPipe (for real-time tracking)
  • LabelImg (for annotation)

I tried a few others, but these became my go-to tools.

Practical Tips for Building Better Computer Vision Projects

If I had to give advice based on experience:

Start small. Don’t jump into complex systems immediately.

Focus on understanding:

  • Image preprocessing
  • Dataset handling
  • Model evaluation

Also, document your work.

I didn’t do this at first, and it made debugging harder.

Another tip—test in different environments.

Lighting, angles, and backgrounds can completely change results.

The Emotional Side of Learning Computer Vision

I won’t sugarcoat it—this field can be frustrating.

There were days when nothing worked.

Models failed. Code broke. Results made no sense.

But then… small wins started happening.

A model finally worked. A detection improved.

Those moments make it worth it.

Are Computer Vision Projects Worth It for Your Career?

Absolutely—if done right.

Projects show:

  • Practical skills
  • Problem-solving ability
  • Understanding of real-world applications

But don’t just copy tutorials.

Build something, break it, fix it.

That’s where real learning happens.

Conclusion

Computer vision projects are one of the best ways to learn AI and machine learning, but they’re not as easy as they seem at first.

From my experience, the biggest growth came from making mistakes—bad datasets, wrong models, poor evaluation.

Each project taught me something different, from basic image classification to advanced real-time systems.

If you’re starting out, keep it simple, stay consistent, and don’t get discouraged when things don’t work immediately.

Because eventually, they will.

FAQ: Computer Vision Projects

  1. What is the best beginner computer vision project?

Image classification is the easiest starting point.

  1. Do I need a powerful computer?

Not always. Many beginner projects can run on a standard laptop.

  1. Which programming language is best?

Python is the most widely used for computer vision.

  1. How long does it take to build a project?

Simple projects can take a few hours; advanced ones may take weeks.

  1. Are datasets necessary?

Yes, and their quality significantly impacts results.

  1. Can I use pre-trained models?

Yes, they are commonly used and save time.

  1. Is computer vision hard to learn?

It can be challenging, but manageable with consistent practice.

  1. What industries use computer vision?

Healthcare, automotive, security, retail, and more.

Education Department New Loan Plan: What I Learned the Hard Way (and What You Should Know Before Applying)

Education Department New Loan Plan

Education Department New Loan Plan

Understanding the Education Department’s New Loan Plan

I still remember the first time I heard about a “new student loan plan” from the Education Department. It sounded like one of those things that’s too good to be true, you know? Lower monthly payments, flexible repayment terms, maybe even loan forgiveness.

But here’s the thing—what is often misunderstood is how these plans actually work in real life, not just on paper.

The Education Department’s new loan plan (often tied to income-driven repayment programs or updated federal loan relief policies) is designed to make student debt more manageable. The idea is simple: your monthly payment is based on your income, not just the total loan amount.

In theory, that’s a lifesaver. In practice… well, there are a few things I wish someone had told me earlier.

My First Experience Applying (Spoiler: I Messed Up)

I’ll be honest, I rushed the application.

I saw “lower monthly payments” and jumped straight in without reading the fine print. Big mistake. Like, seriously.

The process itself isn’t that complicated—fill out your financial details, link your income data, and choose a repayment plan. But I didn’t fully understand how my adjusted gross income would affect my monthly payments.

At one point, my payment was calculated higher than expected. Why? Because I didn’t update my income after a change. That part was kinda buried in the instructions.

Lesson learned: always keep your income information updated, or you might end up paying more than necessary.

Key Features of the New Loan Plan You Should Know

Income-Driven Repayment (IDR) Structure

The biggest selling point is the income-driven repayment model. Your monthly payments are capped at a percentage of your discretionary income.

From what I’ve seen, this can be anywhere from 5% to 10%, depending on the specific plan.

It sounds small, but it makes a huge difference. I went from feeling suffocated by fixed payments to something that actually fit my budget.

Loan Forgiveness After a Certain Period

This part gets hyped a lot—and yeah, it’s legit—but it’s also misunderstood.

If you make consistent payments for 20 to 25 years (sometimes less depending on the plan), the remaining balance can be forgiven.

But here’s the catch: the forgiven amount might be considered taxable income. That surprised me, not gonna lie.

Lower Payments, But Longer Terms

Lower monthly payments feel great.

But what is often overlooked is that you may end up paying more in total over time because of interest accumulation.

I noticed this when reviewing my loan summary. The total repayment amount had quietly increased.

It’s not a scam—it’s just how the math works.

Who Benefits Most From This Plan?

From what I’ve experienced and seen others go through, this plan works best for certain groups.

If your income is unstable or relatively low, this plan can be a real safety net.

Freelancers, entry-level professionals, or anyone going through career transitions tend to benefit the most.

On the flip side, if you have a high and stable income, a standard repayment plan might actually save you more money in the long run.

I didn’t realize that at first. I assumed “lower payment = better,” which isn’t always true.

Common Mistakes People Make (Yeah, I Did These Too)

Not Recertifying Income Annually

This one almost got me.

You’re required to update your income every year. If you forget, your payment could jump back to the standard rate.

And trust me, that jump is not fun.

Ignoring Interest Growth

It’s easy to focus only on monthly payments. I did that for a long time.

But interest keeps growing, especially if your payments are low.

There was a point where my balance barely moved. That was frustrating, honestly.

Choosing the Wrong Plan Option

There isn’t just one “new loan plan.” There are several variations under the federal system.

I picked one without comparing others. Looking back, I should’ve spent at least an hour reviewing options.

It would’ve saved me money. Simple as that.

Step-by-Step: How to Apply the Right Way

If I had to do it again, here’s exactly how I’d approach it:

Step 1 – Gather Your Financial Information

Have your tax return, income records, and employment details ready.

This speeds things up and reduces mistakes.

Step 2 – Use the Official Loan Simulator

This tool shows estimated monthly payments under different plans.

I skipped it the first time… and yeah, regret.

Step 3 – Compare All Available Plans

Don’t just pick the first option.

Look at:

  • Monthly payment amount
  • Total repayment cost
  • Forgiveness timeline

Step 4 – Submit and Monitor Your Application

Once submitted, keep checking your loan status.

Sometimes documents are requested again, and delays can happen.

Practical Tips I Wish I Knew Earlier

One thing that helped me later on was setting a reminder for annual recertification.

It sounds small, but it saved me from unexpected payment increases.

Another tip? Pay a little extra when you can.

Even an extra $20 or $50 per month can reduce interest over time. It’s not required, but it helps more than you’d think.

Also, keep copies of everything. I once had to re-submit documents because something got “lost” in processing. That was annoying.

Emotional Side of Managing Student Loans (No One Talks About This Enough)

I’ll say this straight—dealing with student loans can feel overwhelming.

There were times I avoided checking my balance. Not proud of that, but it happens.

The new loan plan does help reduce that stress, especially when payments are aligned with your income.

But it doesn’t make the debt disappear overnight.

You still need a strategy. And patience. A lot of it.

Is the New Loan Plan Worth It?

Short answer: it depends.

For me, it was worth it because it gave me breathing room financially.

But I had to learn how to use it properly. It’s not just a “set it and forget it” kind of thing.

If you go in informed, it can be a powerful tool.

If you rush into it like I did… well, you might end up fixing mistakes later.

Conclusion

The Education Department’s new loan plan is a helpful option for managing student debt, especially for those with fluctuating or limited income.

From my experience, the biggest benefits come from understanding how income-driven repayment works, staying on top of annual updates, and choosing the right plan based on your financial situation.

It’s not perfect, and it’s not a quick fix—but it does provide flexibility and relief when used correctly.

Take your time, read the details, and don’t make the same rushed decisions I did. You’ll thank yourself later.

FAQ: Education Department New Loan Plan

  1. What is the Education Department’s new loan plan?

It is a federal student loan repayment option that adjusts monthly payments based on your income and family size.

  1. Who qualifies for this loan plan?

Most borrowers with federal student loans are eligible, especially those experiencing financial hardship or lower income.

  1. How are monthly payments calculated?

Payments are typically calculated as a percentage (5%–10%) of your discretionary income.

  1. Is loan forgiveness guaranteed?

Loan forgiveness is possible after 20–25 years of qualifying payments, but conditions must be met.

  1. Do I need to update my income regularly?

Yes, income must be recertified annually to maintain accurate payment amounts.

  1. Can I pay extra on this plan?

Yes, you can make extra payments at any time without penalty.

  1. Will I pay more in the long run?

Possibly. Lower monthly payments can lead to higher total interest over time.

  1. Is this plan better than standard repayment?

It depends on your income and financial goals. Lower payments help short-term, but standard plans may cost less overall.